

If you’re looking for the perfect dessert that’s as delightful to eat as it is to share, this Strawberry Cake Balls Recipe is just the thing!
These sweet and creamy bite-sized treats are ideal for any occasion, from elegant tea parties with friends to Valentine’s Day celebrations filled with love.
The rich, strawberry-flavored center coated in a smooth, decorative shell makes this Strawberry Truffles Recipe a standout.
Whether you’re hosting a gathering for adults or creating fun moments with kids, these mini treats are a delicious way to impress and indulge.
Check out the detailed recipe below!

Strawberry Cake Truffles: The Perfect Mini Treat for Celebrations
Step 1: Prepare the Cake Mix
Before diving into the mixing and shaping, the first step ensures your cake mix is safe to use.
Preheat your oven to 350°F and spread the dry strawberry cake mix evenly onto a parchment-lined baking sheet.
Heat-treating the mix for five minutes eliminates any potential bacteria, making it perfect for no-bake recipes.
Once baked, transfer the mix to a wire rack and let it cool completely. This is also a great time to gather your other ingredients, so everything is ready when you start creating.

Step 2: Mix Up the Dough
In a medium mixing bowl, beat the softened cream cheese with a hand mixer until it reaches a smooth, velvety consistency.
Gradually add the cooled cake mix in small increments, stirring gently with a spatula to minimize mess.
Once the mix is fully incorporated, switch back to your hand mixer to create a dough-like consistency.
For an extra burst of flavor, fold in the chopped cream cheese chips, ensuring they’re evenly distributed throughout the dough.
The chips add little pockets of creamy sweetness that take these truffles to the next level.

Step 3: Chill the Dough
Wrap the dough tightly with plastic wrap and place it in the refrigerator for at least two hours.
This chilling period is crucial, as it allows the dough to firm up, making it much easier to handle when it’s time to roll into truffles.
Use this time to prepare your workspace and gather tools like a cookie scoop, parchment paper, and baking sheets.
Step 4: Shape the Truffles
Once the dough has chilled, it’s time to shape the truffles.
Line two baking sheets with parchment paper to prevent sticking.
Using a small cookie scoop (about 1½ tablespoons), portion out the dough and roll each portion into a smooth ball between your hands.
Arrange the balls on the prepared baking sheets, leaving a little space between each one. Let the shaped truffles rest for about 15 minutes before coating.
This rest period reduces the chance of cracking when you dip them into the melted coating.

Step 5: Melt the Vanilla Coating
For a smooth and even coating, melt the vanilla melting wafers over a double boiler on low heat.
Stir the wafers continuously to prevent scorching, or alternatively, use the microwave in 30-second intervals, stirring between each session until fully melted.
The double boiler method is particularly useful for maintaining an even temperature, which keeps the coating easy to work with throughout the dipping process.
Step 6: Coat the Truffles
Now comes the fun part—dipping the truffles! Place one dough ball on a fork and gently lower it into the melted vanilla coating.
Lift it out and tap the fork lightly on the edge of the bowl to let the excess coating drip off.
Carefully transfer the coated truffle back to the parchment-lined baking sheet.
Repeat this process for all the truffles, working efficiently to coat each one.
If you want to add sprinkles, sprinkle them over half of the truffles while the coating is still wet so they adhere perfectly.

Step 7: Add Decorative Touches
To give your truffles a polished and festive finish, melt the pink and bright pink candy melts in separate microwave-safe piping bags.
Heat them in 15-second intervals, kneading the bags gently between each session, until the candy melts are smooth and flow easily.
Snip a small tip off each bag and drizzle the melted candy over the remaining truffles in thin, artistic lines.
This step is where you can really get creative—try swirling the colors or layering them for a playful effect.
Step 8: Set and Serve
Allow the truffles to set completely before serving.
You can leave them at room temperature or place the baking sheets in the fridge for faster results.
Once the coating has hardened, your Strawberry Cake Truffles are ready to be enjoyed! Serve them on a decorative platter or package them in gift boxes for a thoughtful and delicious present.
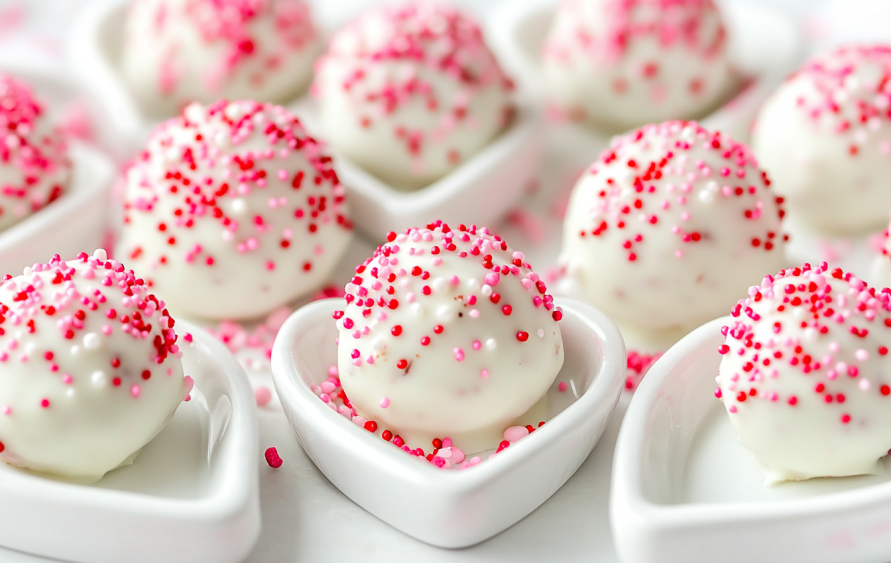
These Strawberry Cake Truffles are a guaranteed crowd-pleaser, whether you’re making them for a special occasion or just treating yourself.
Their vibrant pink hues and irresistible flavor make them the star of any dessert table.
See The Quick Recipe Version below-
Strawberry Cake Truffles
It’s the perfect mini treat for any dessert lover.
Ingredients
- 15.25 ounces strawberry cake mix (such as Betty Crocker)
- 8 ounces cream cheese, softened
- ⅓ cup chopped cream cheese chips
- 20 ounces vanilla melting wafers (e.g., Ghirardelli)
- ½ cup pink candy melts
- ½ cup bright pink candy melts
- Sprinkles (optional)
Instructions
- Prepare the Cake Mix
Preheat your oven to 350°F and line a baking sheet with parchment paper. To ensure the cake mix is safe to use, spread it out on the baking sheet and bake for 5 minutes to heat-treat it. Once done, allow the mix to cool completely on a wire rack. - Create the Dough
In a medium bowl, beat the softened cream cheese with a hand mixer until it’s smooth and creamy. Gradually add the cooled cake mix to the bowl, stirring gently with a spatula to avoid messes. Once incorporated, use the hand mixer again to blend everything into a dough-like consistency. Mix in the chopped cream cheese chips until evenly distributed. - Chill the Dough
Cover the dough with plastic wrap and refrigerate for at least 2 hours. This step ensures the truffles are firm and easier to handle. - Shape the Truffles
Line two baking sheets with parchment paper. Use a small cookie scoop (about 1½ tablespoons) to portion out the dough, rolling each scoop into a smooth ball. Place the balls on the prepared sheets and let them rest for 15 minutes to prevent cracking during coating. - Melt the Coating
Melt the vanilla wafers using a double boiler over low heat or microwave them in 30-second intervals, stirring until smooth. The double boiler method keeps the coating at an even temperature, making it easier to work with. - Coat the Truffles
Place a dough ball on a fork, dip it into the melted vanilla coating, and gently tap the fork on the edge of the bowl to remove excess. Transfer the coated truffle to the lined baking sheet. Repeat with all the truffles, spacing them 2 inches apart. If desired, add sprinkles to half of the truffles before the coating sets. - Decorate
Melt the pink and bright pink candy melts in separate microwave-safe piping bags, heating them gently until smooth. Snip the tips of the bags and drizzle the melted candy over the remaining truffles for a decorative touch. - Set and Serve
Allow the truffles to set completely before serving. Enjoy these sweet, strawberry-infused bites!

Strawberry Cake Truffles are the ultimate blend of charm and indulgence, making them a perfect treat for countless occasions.
From Valentine’s Day sweets to dainty additions for tea parties, their vibrant pink color, creamy texture, and delightful flavor are sure to impress.
The combination of simple ingredients and easy-to-follow steps ensures anyone can create these bite-sized masterpieces.
Whether you’re sharing them as gifts, serving them at a party, or enjoying them with loved ones, these Strawberry Cake Truffles are a sweet way to celebrate life’s little moments.
Try them for yourself and let their irresistible charm brighten your day!
Pin It On Pinterest For Later!