Valentine’s Day is the perfect excuse to indulge in sweet, decadent treats, and what could be better than cupcakes?
From rich chocolate creations to fruity and festive flavors, these Valentine’s Day cupcake recipes are designed to add a little love to your dessert table.
Whether you’re celebrating with a romantic dinner or a cozy gathering, these cupcakes are sure to impress and delight.
See this delicious list of Valentine’s Day cupcakes below and pick your favorite one to make.
13 Decadent Valentine’s Cupcakes to Share the Love
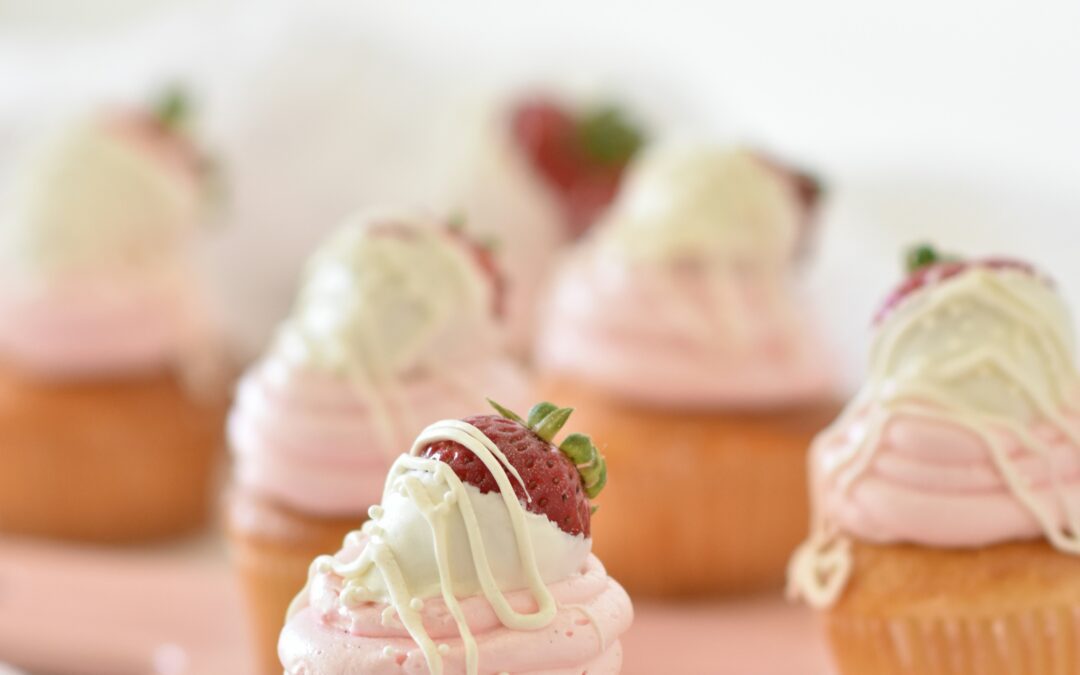
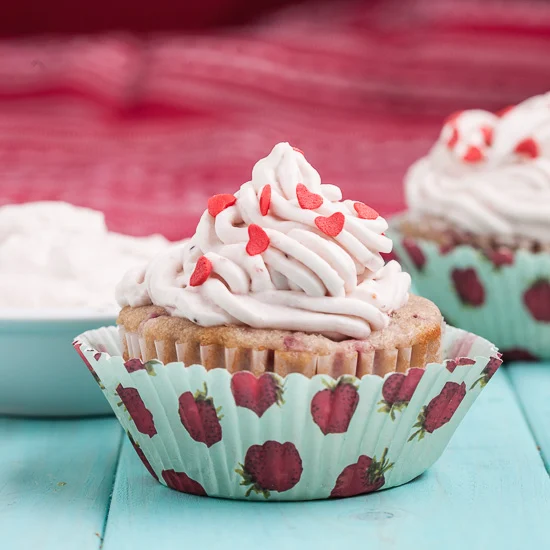
Strawberry Cupcakes with whipped Cream Frosting
Here we have the most delicious-looking Valentine’s Day treat.
These Fresh Strawberry Cupcakes with Whipped Cream Frosting are a cupid-approved indulgence that perfectly captures the essence of love in every bite.
The recipe skillfully combines the sweetness of fresh strawberries with the light, airy texture of the cupcakes, while the billowy whipped cream frosting adds a heavenly touch.
It’s a symphony of flavors that dances on the taste buds, making it an ideal choice for celebrating love and sweetness on Valentine’s Day.
If you’re looking to elevate your romantic dessert game, this recipe is a must-try. Check out the mouthwatering details at Chew Out Loud.
Valentine’s Day is the perfect excuse to indulge in desserts that are as sweet and romantic as the occasion itself.
From decadent cakes to vibrant cheesecakes and everything in between, these treats are designed to impress and satisfy your loved ones.
Whether planning an elegant dinner, a cozy date night at home, or a festive gathering, these Valentine’s Day dessert ideas will add a deliciously memorable touch to your celebration.
Get ready to whip up some love in the kitchen with these irresistible recipes!
29 Valentine’s Day Dessert Recipes to Make Their Heart Melt
No-Bake Dragon Fruit Cheesecake Bars
These no-bake dragon fruit cheesecake bars are perfect for a Valentine’s Day dessert that’s as visually stunning as it is delectable.
Featuring a buttery graham cracker crust topped with creamy cheesecake layers, the real star of the show is the vibrant dragon fruit puree swirled throughout.
The result is a dessert that’s equally indulgent and refreshing, with a pop of exotic fruit flavor.
The process begins with a simple graham cracker crust that provides the perfect buttery base.
The cheesecake layers are created with cream cheese, Greek yogurt, and a touch of whipped cream for a dreamy, light texture.
The dragon fruit puree not only enhances the flavor but creates a swirl of deep pink that makes these bars irresistible.
Best of all, this dessert is entirely no-bake, making it a stress-free option for your Valentine’s celebration.
Get the full recipe for No-Bake Dragon Fruit Cheesecake Bars here!
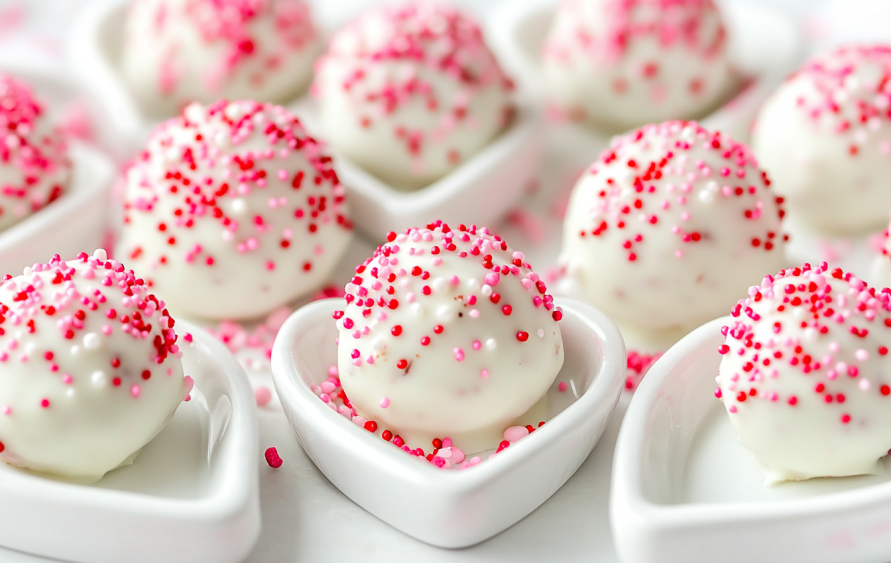
Red Velvet Cake Balls with White Chocolate and Sprinkles
These Red Velvet Cake Balls are a bite-sized indulgence that packs all the deliciousness of a classic red velvet cake into one perfect pop.
Made from moist, crumbled red velvet cake and sweet cream cheese frosting, these cake balls are then dipped in creamy white chocolate for an extra layer of decadence.
To top it off, a sprinkle of colorful confetti or festive sprinkles adds a fun and eye-catching finishing touch.
Not only are these cake balls a delightful treat for the taste buds, but they also make a beautiful addition to any Valentine’s Day dessert table or celebration.
With their vibrant red hue, smooth white chocolate coating, and playful sprinkles, they are as stunning as they are delicious.
For the full recipe and step-by-step instructions on how to make these irresistible Red Velvet Cake Balls, see this page here.
Strawberry Cheesecake Cookies
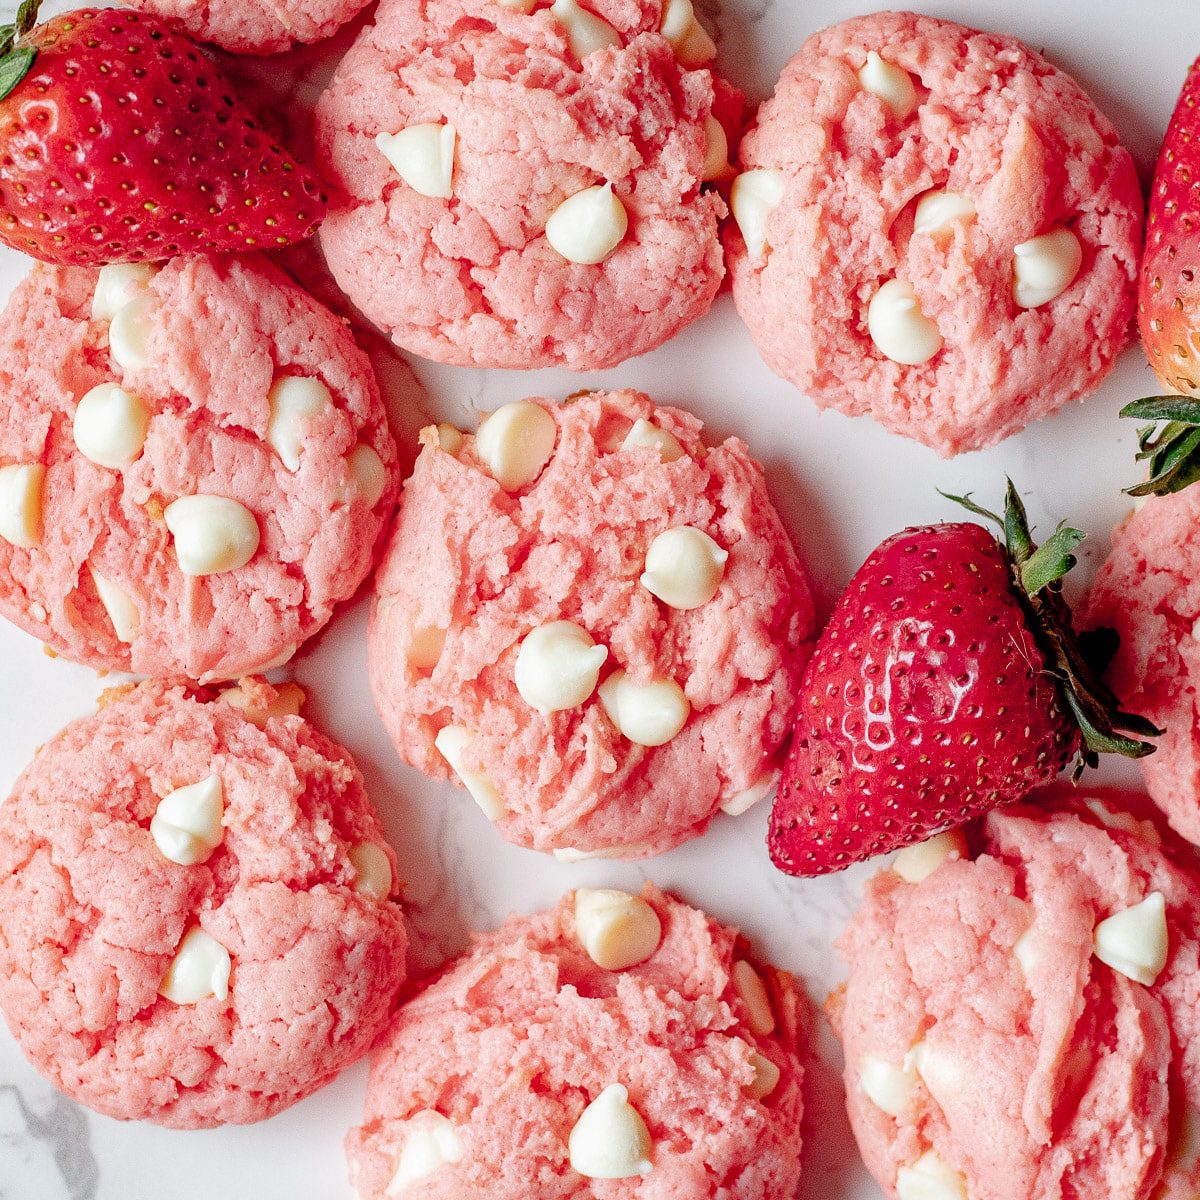
These soft and chewy Strawberry Cheesecake Cookies combine the best flavors of strawberry and cheesecake in one delightful bite.
With just a few simple ingredients—cream cheese, strawberry cake mix, and a touch of white chocolate chips—these cookies come together quickly and easily.
The cream cheese adds a rich, creamy texture, while the strawberry cake mix brings that sweet, fruity flavor that’s perfect for any occasion.
Chilled dough helps the cookies maintain their shape while baking, ensuring golden, crispy edges with a soft and chewy center.
To get the full recipe, click here
Red Velvet Brownies with Cream Cheese Swirl
These red velvet brownies with a rich cream cheese swirl are a simple yet decadent dessert perfect for Valentine’s Day.
With only five ingredients, you can whip up a batch in under 30 minutes!
The brownies themselves have a dense, fudgy red velvet base that’s complemented by a luscious cream cheese topping, making for a perfect balance of sweet and tangy.
To make these irresistible treats, all you need is a box of red velvet cake mix, some eggs, vegetable oil, and cream cheese.
The cream cheese filling, sweetened with powdered sugar, is poured over the batter and gently swirled in, creating a beautiful contrast of color and flavor.
After baking, these brownies develop a slightly crisp top and a soft, gooey center.
Get the full recipe for Red Velvet Brownies with Cream Cheese Swirl here!
Red Velvet Macarons
These Red Velvet Macarons combine the elegance of classic French macaroons with the beloved flavors of red velvet cake.
With their perfect crispy texture, the bright white macaron shells are paired with a creamy red velvet filling made from butter, cream cheese, and red velvet cake mix, offering a delightful contrast in flavor and appearance.
While these macaroons require patience, the process results in a stunning dessert that’s sure to impress.
The shells are carefully whipped to form stiff peaks, then paired with a decadent filling that has a subtle tanginess from the cream cheese and a rich red velvet flavor.
These macarons are perfect for a special Valentine’s Day treat or any occasion that calls for a unique, elegant dessert.
For the full recipe and step-by-step instructions on how to make these delicious Red Velvet Macarons, click here.
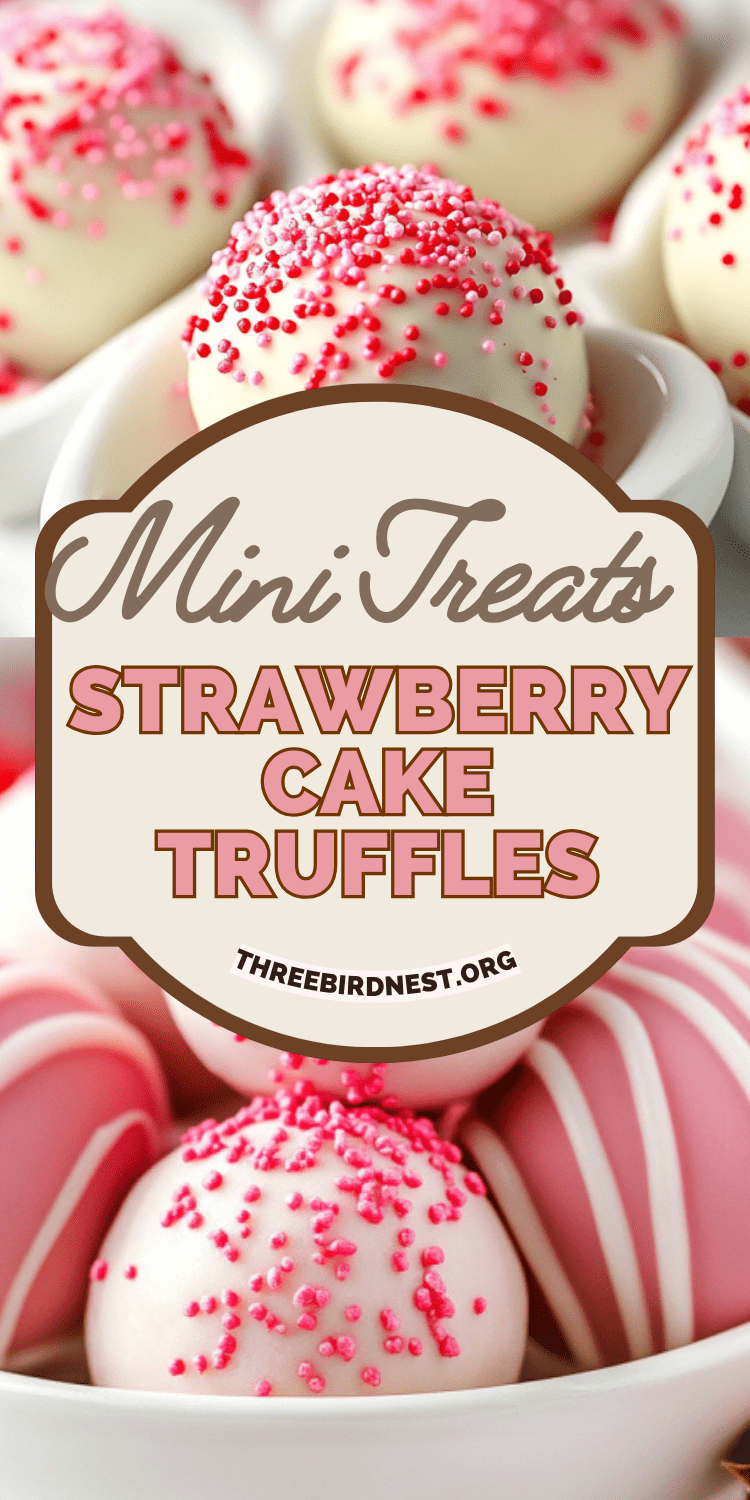
Strawberry Cake Truffles with White Chocolate and Sprinkles
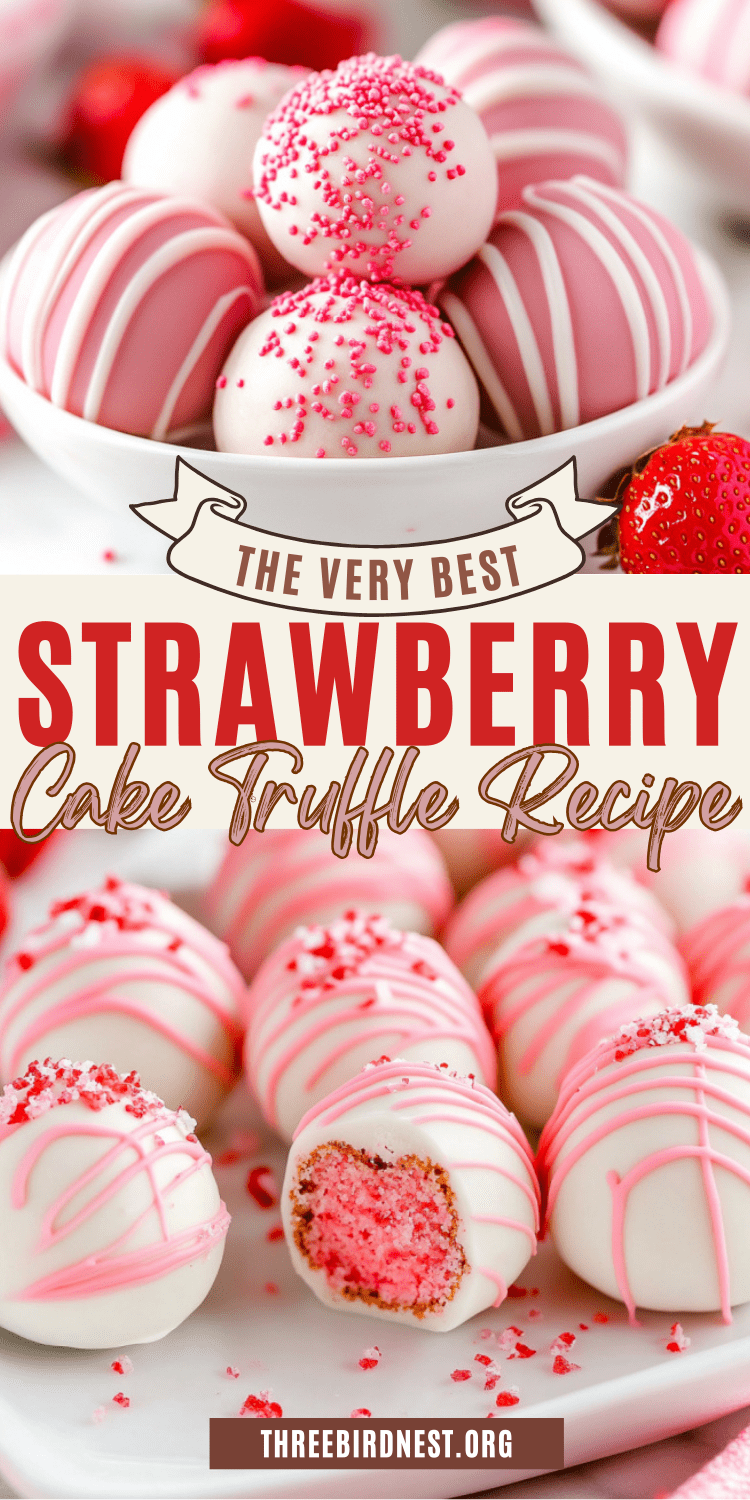
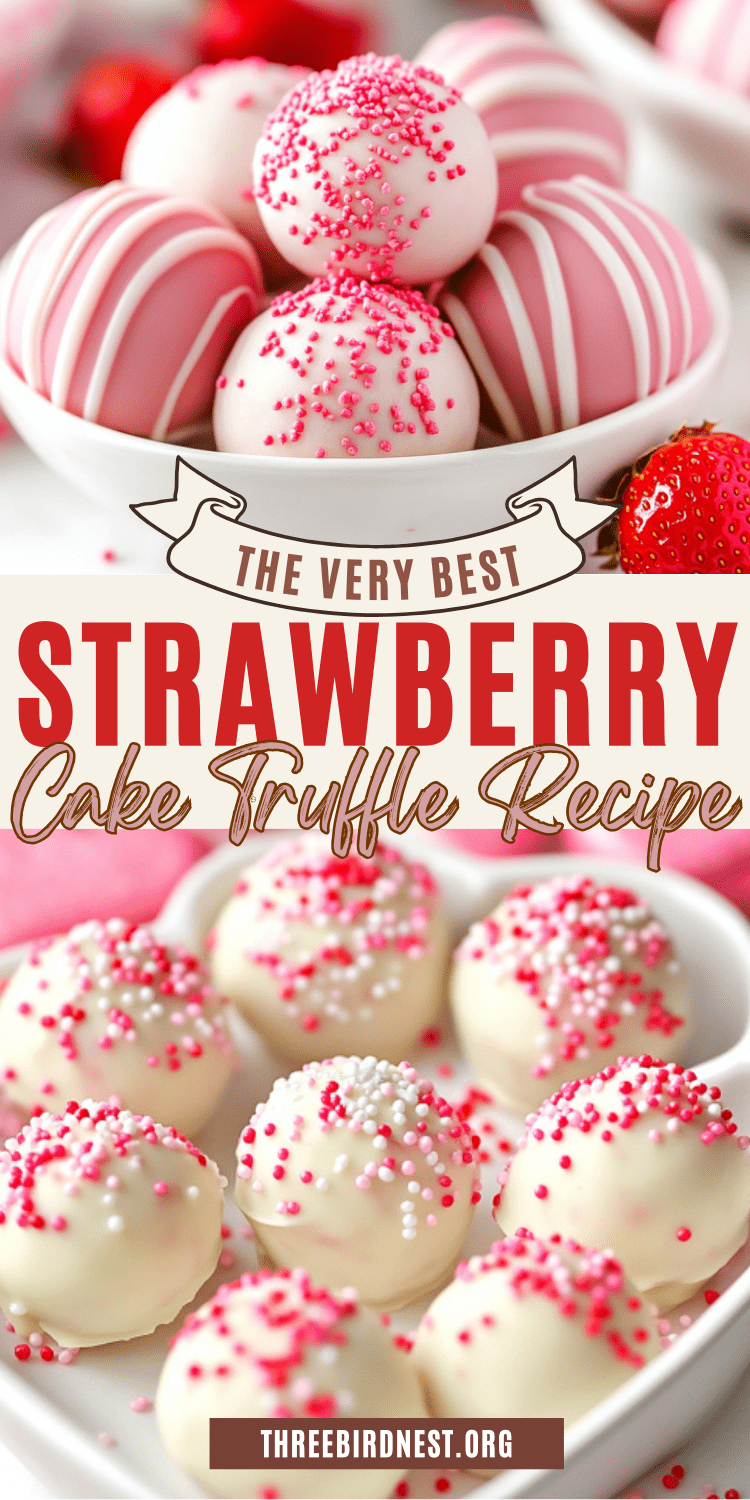
These Strawberry Cake Truffles are the perfect mini treat for any celebration, offering a burst of sweet strawberry flavor encased in a rich, melt-in-your-mouth white chocolate coating.
Made by crumbling a soft, moist strawberry cake and blending it with creamy frosting, these truffles are then dipped in smooth white chocolate and topped with colorful sprinkles for an extra touch of fun and festivity.
Ideal for special occasions or a sweet addition to a Valentine’s Day spread, these truffles are not only delicious but visually appealing, with their pink hue and festive sprinkles.
They’re a delightful combination of texture and flavor, sure to impress guests at any gathering.
For the full recipe and instructions on how to make these irresistible Strawberry Cake Truffles Click here.
No-Bake Red Velvet Cheesecake
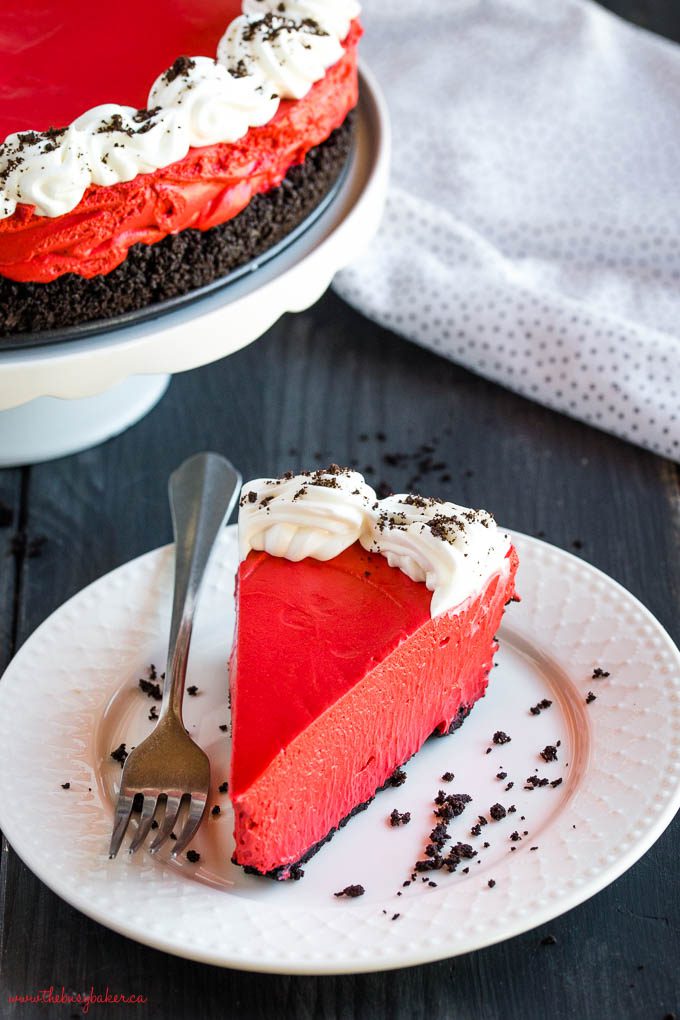
Treat yourself to the ultimate Valentine’s Day dessert with this No-Bake Red Velvet Cheesecake. It’s so pretty and festive for Valentine’s Day.
This recipe offers a smooth, creamy filling bursting with classic red velvet flavor and a subtle hint of chocolate, all nestled in a chocolatey Oreo cookie crust.
The combination of cream cheese melted white and semi-sweet chocolate, and whipped cream creates a luscious texture that melts in your mouth, while the vibrant red hue adds a festive touch.
With no need to turn on the oven, this dessert is both stunning and stress-free to make.
It’s the perfect centerpiece for romantic dinners, holiday gatherings, or any time you’re craving something decadent.
For the full recipe and instructions, click here.
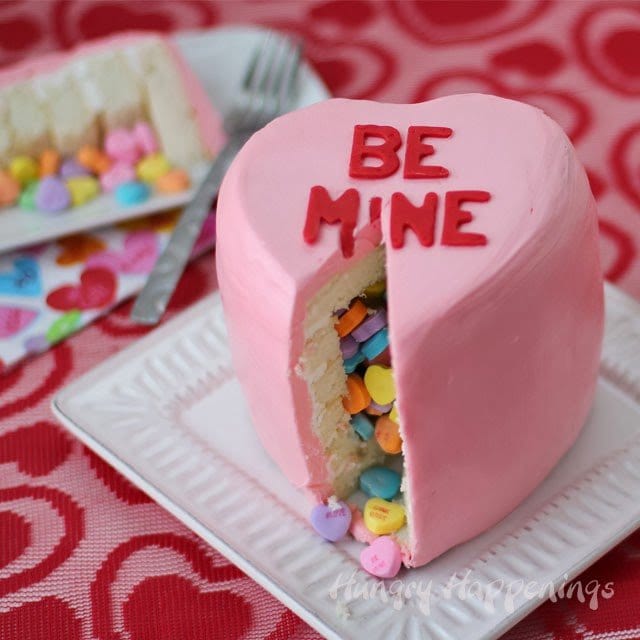
Conversation Heart Piñata Cake
Add a playful and interactive element to your Valentine’s Day celebration with Hungry Happenings’ Conversation Heart Piñata Cake!
This delightful creation is not just a treat for the taste buds but also a surprise-filled experience.
Inspired by classic conversation hearts, the vibrant and festive design makes it a showstopper for your dessert table.
Whether you’re celebrating with friends, family, or someone special, this piñata cake brings fun and flavor to the occasion.
Dive into the world of creative baking by exploring the recipe here: Conversation Heart Piñata Cake. Let the festivities begin with each slice revealing sweet surprises!
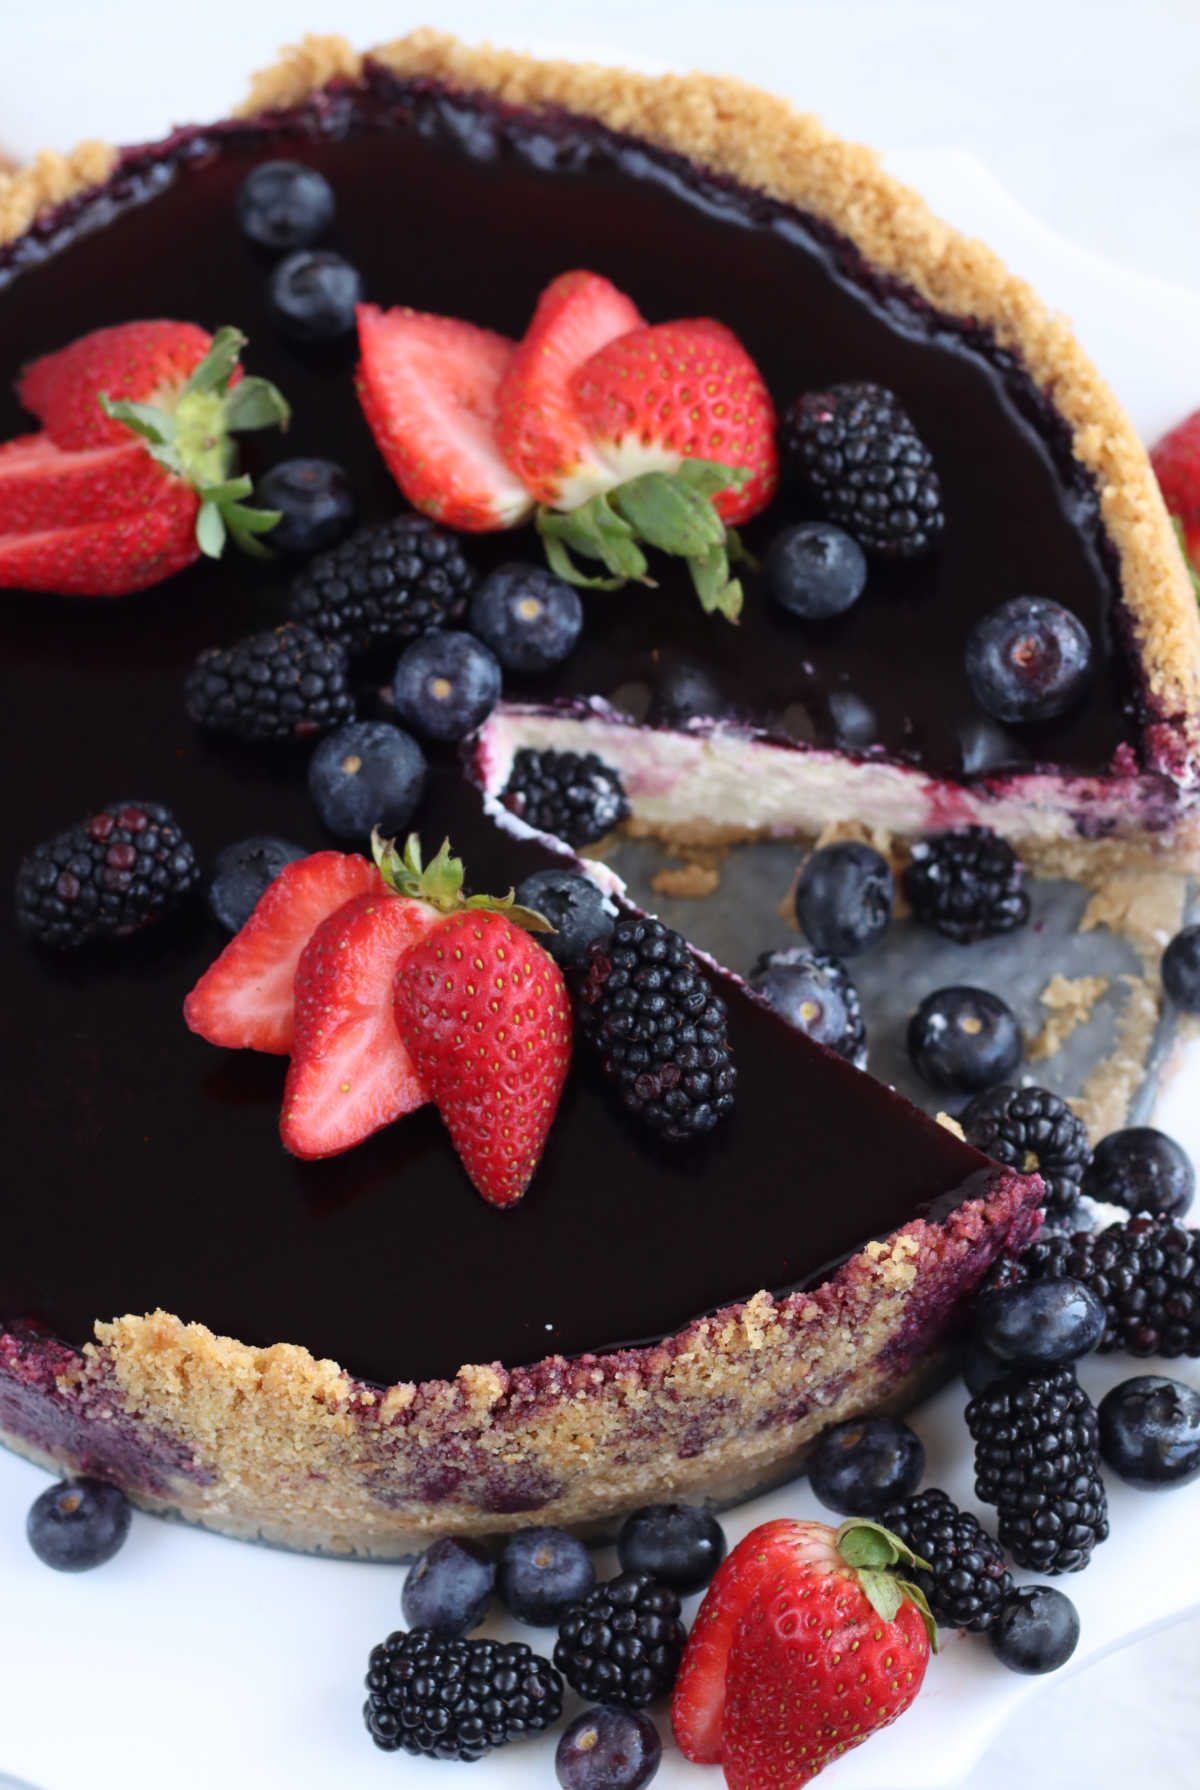
Classic Cheesecake with Dark Berry Topping
Indulge in the elegance of a timeless dessert with this Classic Cheesecake, elevated by a striking dark berry topping.
This New York-style cheesecake features a rich, creamy filling made with cream cheese, sour cream, and a hint of fresh lemon for brightness.
The buttery graham cracker crust provides the perfect foundation for the velvety texture.
But the showstopper is the dark berry topping—a luscious blend of blackberries, blueberries, raspberries, and a touch of raspberry Jell-O that adds a stunning finish and bursts of tart-sweet flavor.
Perfect for special occasions or when you want to impress, this cheesecake pairs beautifully with fresh berries as garnish for a spectacular presentation.
The contrast of creamy cheesecake and vibrant topping ensures every bite is unforgettable. Gosh, this looks so good!
For the full recipe and detailed instructions, click here.
Decadent Godiva Chocolate Cheesecake
Indulge in a slice of pure chocolate bliss with this Godiva Chocolate Cheesecake. Featuring a rich and creamy filling made from Godiva 72% dark chocolate and cream cheese, this dessert is a chocoholic’s dream.
The chocolate wafer crust adds a perfect crunch to complement the silky texture of the cheesecake, while the subtle hint of coffee enhances the deep chocolate flavor.
Whether topped with fresh raspberries for a fruity contrast or garnished with grated dark chocolate and optional vanilla whipped cream, this cheesecake is a show-stopping centerpiece for any celebration.
Perfect for special occasions or simply treating yourself, it’s an irresistible dessert that rivals anything from the Cheesecake Factory.
For the complete recipe and instructions, click here.
Red Velvet Molten Lava Cakes
Experience the magic of red velvet with these decadent molten lava cakes, perfect for an elegant dessert or a romantic night in.
The rich, velvety batter combines white chocolate, cocoa powder, and a vibrant red hue to create the ultimate indulgence.
When baked, the cakes form a delicate crust, while the center remains irresistibly gooey, offering a molten surprise with every bite.
These individual-sized cakes are a feast for the eyes and taste buds, ideal for impressing your guests or treating yourself to something special.
Dust with powdered sugar and serve warm for a show-stopping dessert.
For the full recipe and step-by-step instructions, click here.
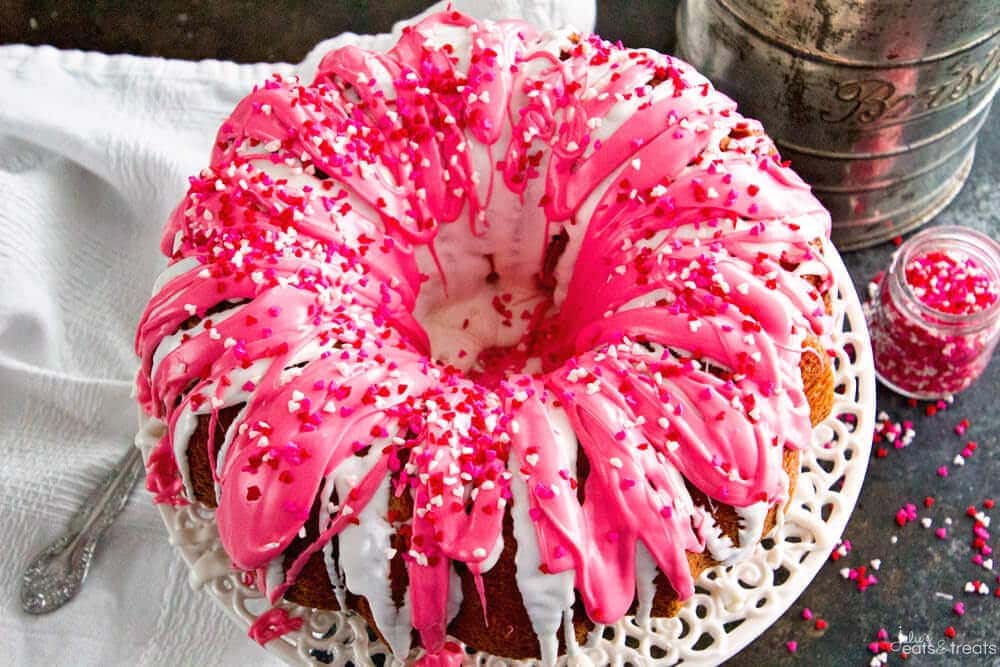
Valentine’s Swirl Bundt Cake
This delightful Valentine’s swirl cake is the perfect way to add a festive and sweet touch to your celebration.
Featuring a soft and moist white cake mix swirled with vibrant strawberry Jell-O, this dessert is as beautiful as it is delicious.
The swirling effect creates a stunning visual pattern, making it a centerpiece-worthy treat.
Topped with a luscious drizzle of white and pink frosting, this cake is easy to prepare yet impressively elegant.
It’s perfect for a romantic dinner, a Galentine’s gathering, or even a family treat.
To learn how to make this festive dessert, visit Julie’s Eats and Treats
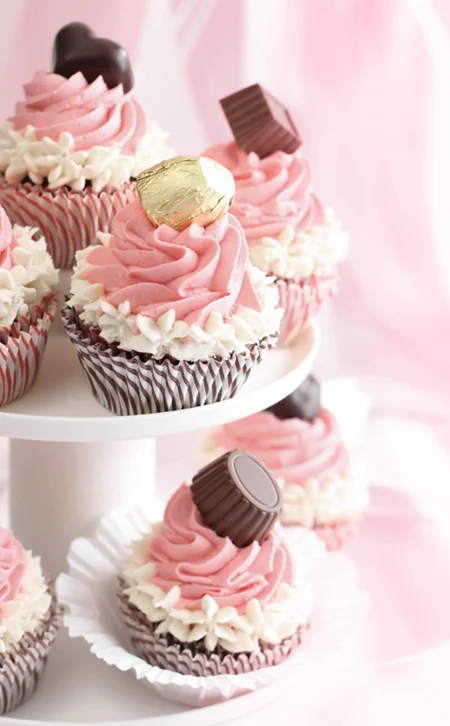
Neapolitan Bonbon Cupcakes
These Neapolitan Bonbon Cupcakes bring a delightful trifecta of flavors perfect for Valentine’s Day, bridal showers, or spring celebrations.
Each cupcake starts with a rich chocolate base, baked to tender perfection.
The highlight is the dual buttercream layers: a classic vanilla layer piped in delicate stars and a strawberry-flavored pink frosting swirled generously in the center.
To complete the elegant look, the cupcakes are crowned with a decadent chocolate bonbon—Belgian or any favorite variety.
Crafted with simple ingredients and a touch of creativity, these cupcakes offer a deliciously nostalgic twist on Neapolitan flavors while doubling as a visual treat.
For full instructions and tips, visit Sprinkle Bakes.
Pink Champagne Cupcakes with Champagne Buttercream Frosting
Celebrate in style with these elegant Pink Champagne Cupcakes, perfect for New Year’s parties, Valentine’s Day, or any special occasion.
The cupcakes are soft, moist, and lightly infused with champagne, creating a delicate flavor profile that feels luxurious.
A hint of pink gel coloring gives them a charming blush tone, making them as delightful to look at as they are to eat.
The champagne buttercream frosting is the crowning touch, blending butter, shortening, and powdered sugar with a splash of champagne for a light, fluffy, and subtly boozy finish.
For an extra flourish, the frosting is piped in elegant swirls and topped with a dainty pink candy ball.
These cupcakes are a deliciously festive way to elevate your dessert table. Get the full recipe at CakeWhiz.
Strawberry Cheesecake Cookies
These Strawberry Cheesecake Cookies deliver a delightful combination of fruity sweetness and creamy indulgence, making them a standout treat for any occasion.
The outer layer features a bright, cake-like strawberry cookie made with cake mix, white chocolate chips, and fresh diced strawberries, giving each bite a vibrant and juicy flavor.
The real magic lies in the luscious cream cheese filling tucked inside.
The creamy, tangy filling balances the sweetness of the cookie perfectly, creating a dessert that’s both rich and refreshing.
Serve these cookies warm for a gooey center or chilled for a firmer bite.
They’re sure to be a hit at gatherings or as an everyday indulgence. Get the recipe at Lambert’s Lately.
Pink Strawberry Champagne Cookies
These Pink Strawberry Champagne Cookies are a delightful way to add a pop of color and fun to any occasion.
Perfect for parties, bridal showers, or just because, these cookies are soft, chewy, and full of subtle strawberry flavor with a sparkling champagne twist.
The cookie dough is made from scratch with classic sugar cookie ingredients, and the batter is tinted a rosy hue with pink food coloring.
Rolled in vibrant sprinkles before baking, these cookies have a festive look that makes them stand out on any dessert table.
Each bite offers a melt-in-your-mouth texture with a sweet, bubbly essence reminiscent of champagne.
Find the full recipe and baking tips at The Soccer Mom Blog.
Red Velvet Donuts with Cream Cheese Glaze
These Red Velvet Donuts are the ultimate baked treat for fans of this classic flavor.
The donuts are soft and fluffy, and feature the rich cocoa-infused taste and vibrant red hue synonymous with red velvet.
Made with buttermilk and a touch of vinegar, they achieve that signature tangy flavor and tender crumb without the need for frying.
Topping it all off is a creamy and decadent cream cheese glaze.
The smooth sweetness of the glaze perfectly complements the subtle cocoa notes in the donuts, creating a bakery-worthy delight you can easily whip up at home.
Whether for brunch, dessert, or a special celebration, these donuts are guaranteed to impress.
Find the recipe at My Happy Bakes,
Strawberry Brownies
If you’re in search of a quick, easy dessert bursting with fruity flavor, these Strawberry Brownies are a must-try.
Made with a simple strawberry cake mix, eggs, and oil, this recipe comes together in minutes, making it perfect for last-minute treats.
The result? A dense, chewy brownie with a delightful strawberry flavor that’s sure to please any crowd.
The finishing touch is a luscious glaze made from powdered sugar, strawberry preserves, and an optional hint of cream cheese for extra richness.
Get the full recipe at Fantabulosity.
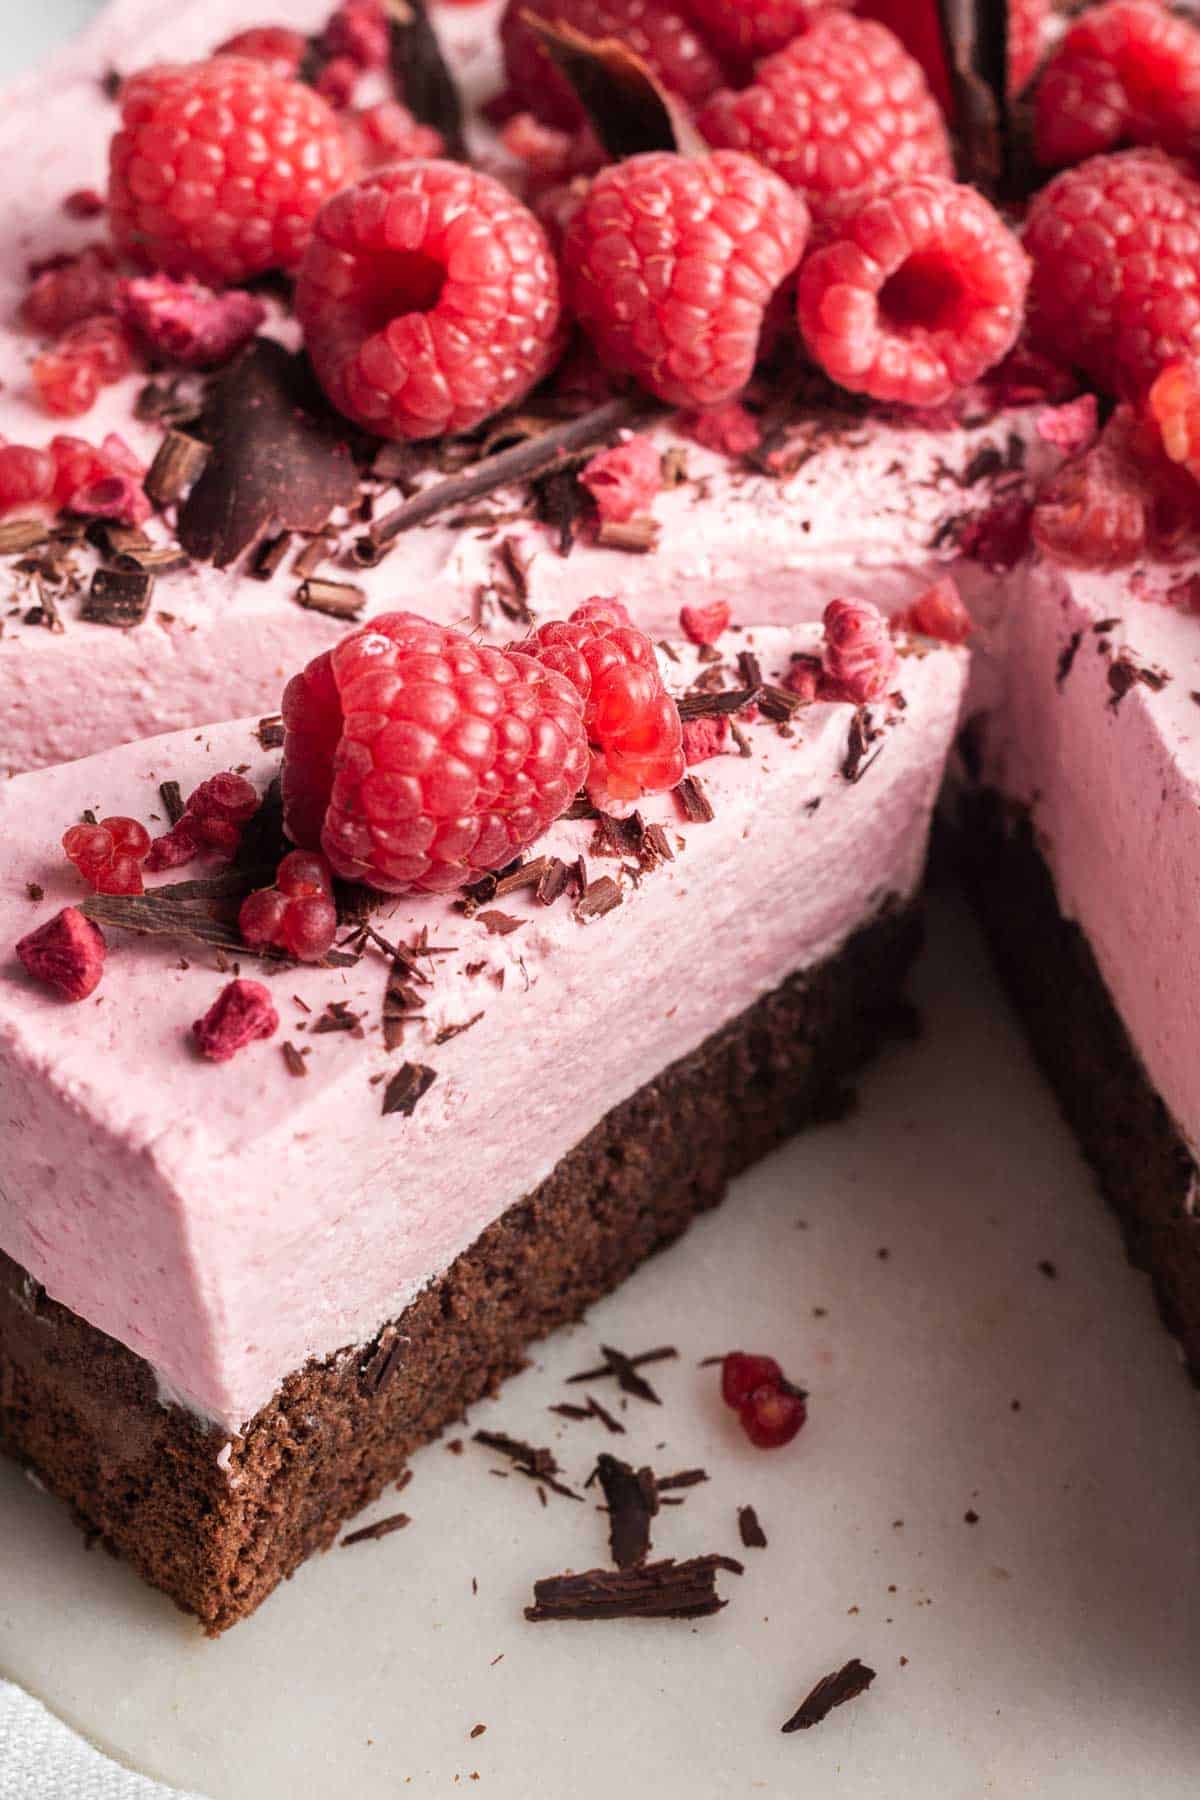
Chocolate Raspberry Mousse Cake
This Chocolate Raspberry Mousse Cake is a decadent yet refreshing treat, perfect for Valentine’s Day or any special occasion.
The airy chocolate sponge serves as the ideal foundation for a light and creamy raspberry mousse, highlighting the natural sweetness and tang of fresh raspberries.
The combination of rich chocolate and the fruity brightness of raspberries creates a harmonious balance that is both indulgent and elegant.
Decorated with fresh raspberries and dark chocolate shavings, this cake is as stunning as it is delicious.
The layers of flavor and texture make it a show-stopping dessert that’s surprisingly achievable with step-by-step preparation.
Find the full recipe at Emma Duckworth Bakes.
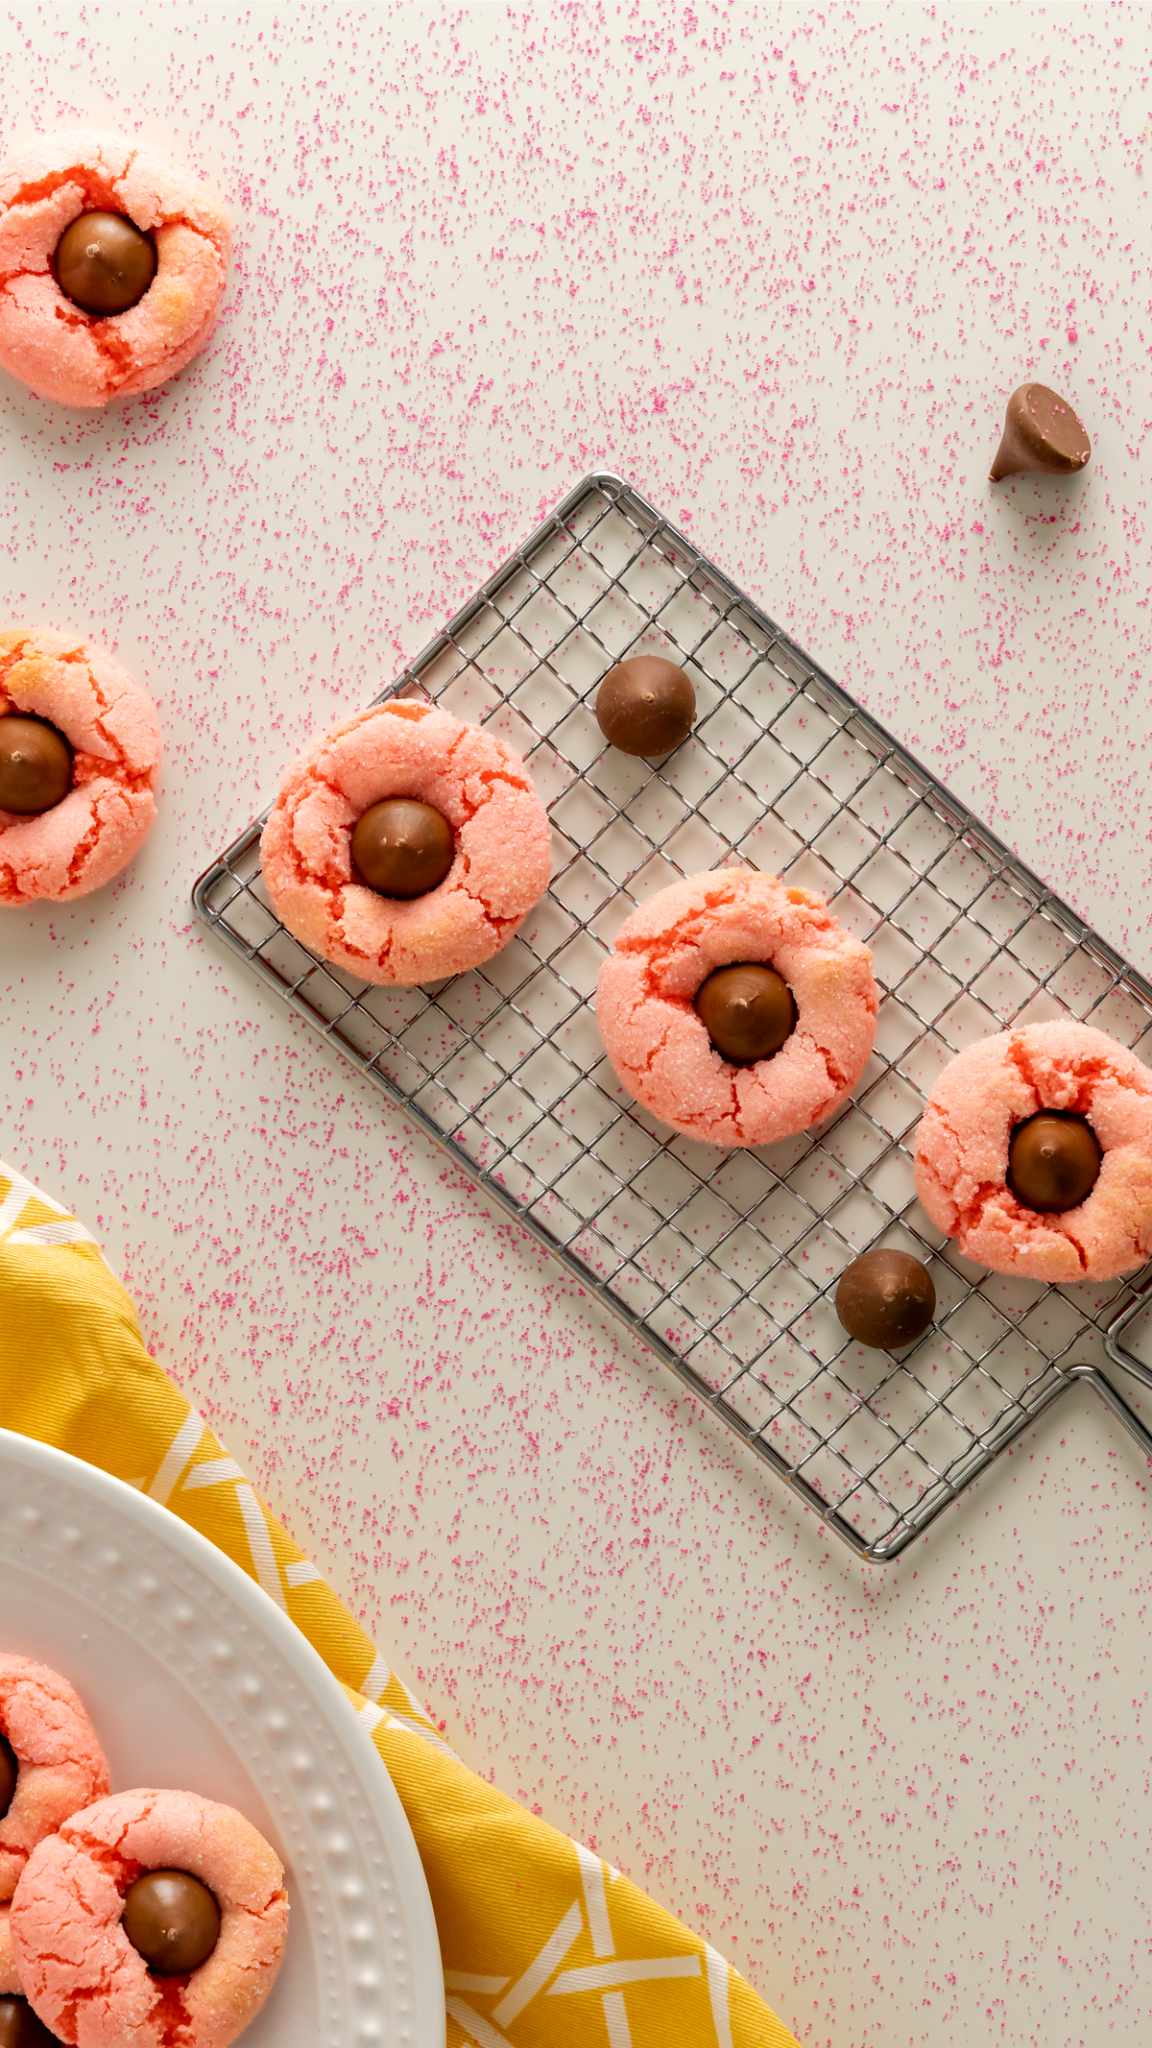
Strawberry Kiss Cookies
These Strawberry Kiss Cookies are a delightful twist on a classic treat, perfect for Valentine’s Day or any festive occasion.
Made with strawberry cake mix, these cookies are soft, chewy, and bursting with strawberry flavor.
Each cookie is rolled in granulated sugar for a touch of sparkle and crowned with a rich Hershey Kiss for a chocolatey center.
The combination of fruity sweetness and velvety chocolate makes these cookies a crowd-pleasing dessert.
Quick and easy to prepare, these cookies bake up in just minutes, making them ideal for last-minute treats or fun baking projects with kids.
For the full recipe and tips, visit Mama Needs Cake.
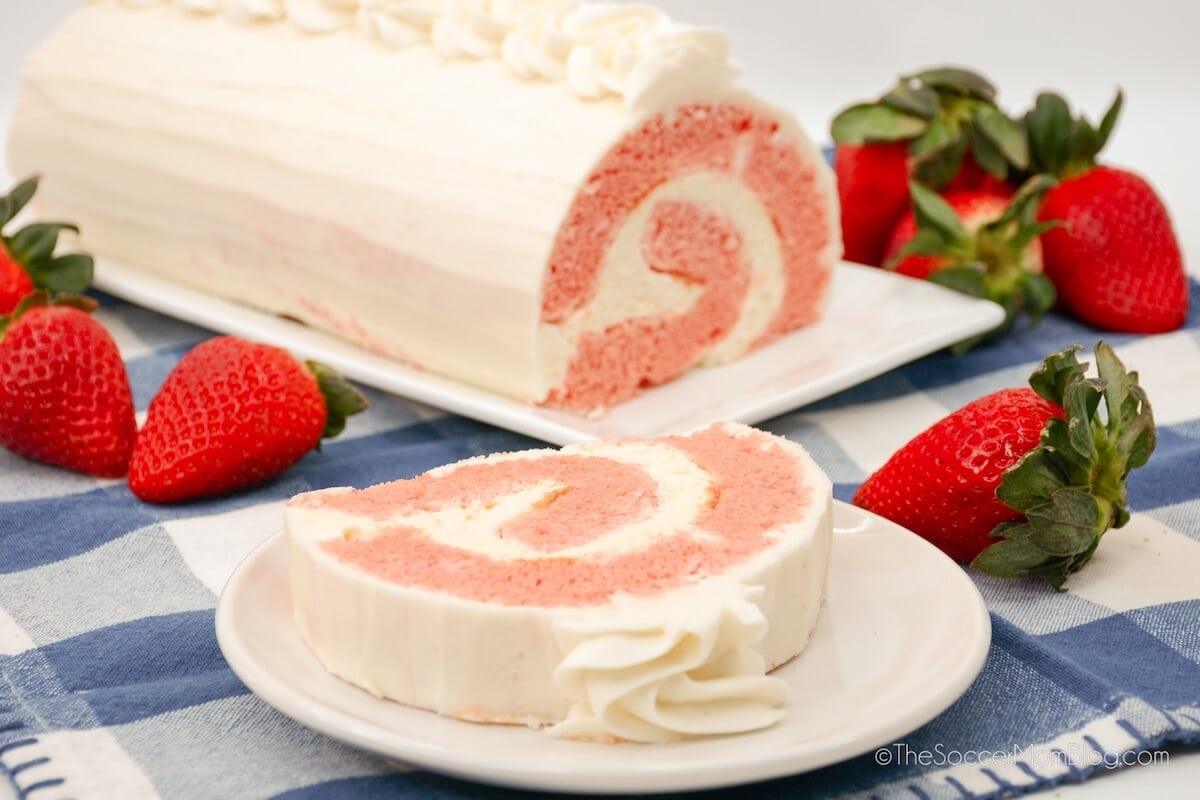
Strawberry Cake Roll
The Strawberry Cake Roll is a stunning dessert that combines light, fluffy cake with creamy, indulgent frosting.
This vibrant treat is ideal for special occasions, from Valentine’s Day to summer parties.
A rolled sponge cake made with strawberry cake mix creates the perfect canvas for a rich cream cheese frosting filling.
The process may look impressive, but it’s simpler than it seems, with straightforward steps to guide you through creating this show-stopping dessert.
The soft, moist cake is balanced perfectly by the tangy, sweet frosting, making each bite irresistible.
Get all the details and tips for this dessert at The Soccer Mom Blog
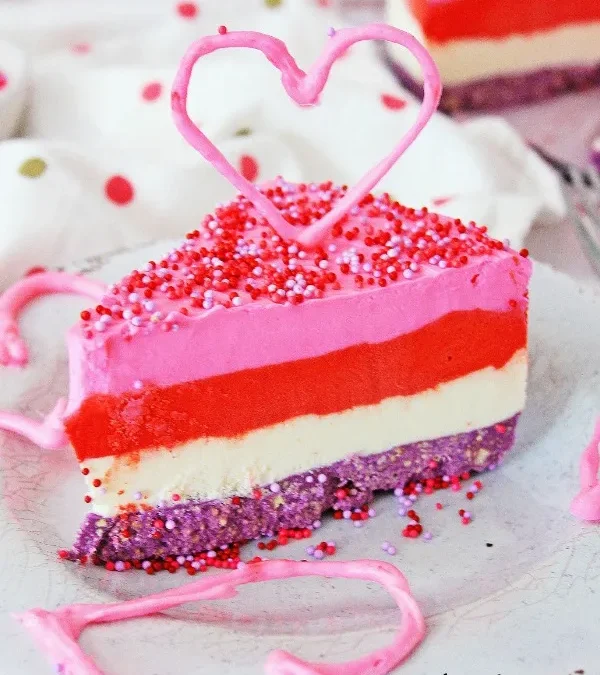
Valentine Cheesecake
This Valentine’s Cheesecake is a showstopper dessert that will melt hearts with its vibrant layers of color and creamy texture.
It’s so pretty and unique looking!
Starting with a purple shortbread crust made from Keebler shortbread, this cheesecake builds into three luscious layers: a white base, a vivid red middle, and a pastel pink top.
Each layer is flavored with a perfectly balanced blend of cream cheese, sour cream, and a hint of vanilla, making every bite smooth and tangy.
The whipped cream folded into the cheesecake mixture gives it an airy, melt-in-your-mouth quality.
To complete the romantic look, the cake is frozen in stages to ensure perfectly set layers.
Once ready to serve, you can decorate the cheesecake with festive hearts or whipped cream for a holiday-inspired touch.
See the full recipe and detailed instructions at Maria’s Mixing Bowl.
No matter how you celebrate Valentine’s Day, the right dessert can make the day even sweeter.
From rich chocolate creations to colorful, playful treats, these recipes are sure to impress your loved ones and create lasting memories.
So grab your apron, spread the love, and enjoy every delicious bite of this heartwarming holiday!
Pin It On Pinterest For Later!
Looking for a heartfelt way to impress your boyfriend this Valentine’s Day?
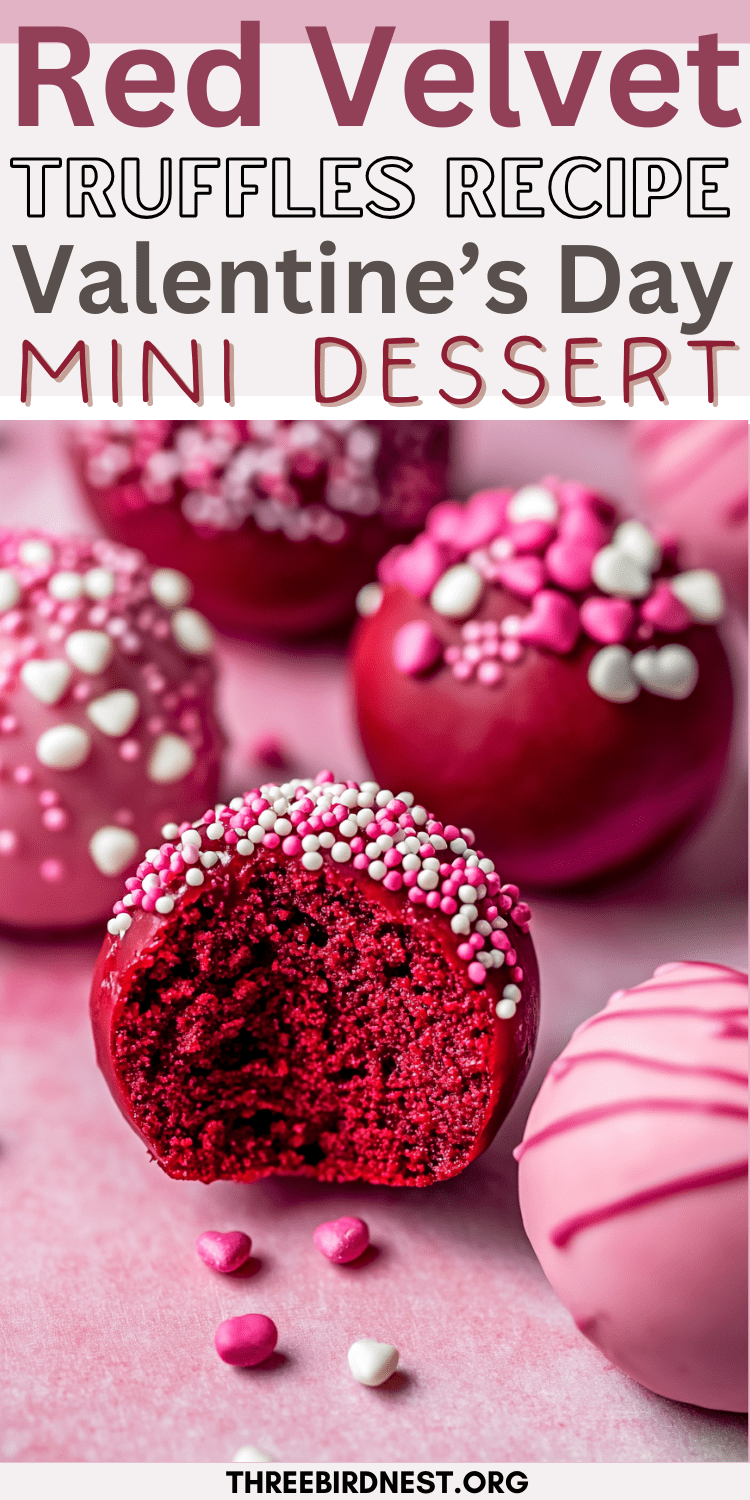
These Red Velvet Truffles are the answer. Combining the indulgent charm of red velvet desserts with a creamy center and a crisp white chocolate shell, they’re the ultimate DIY Valentine’s gift for your boyfriend or partner.
These Red Velvet Truffles are also a great Anniversary Dessert Idea as well.
The rich, vibrant red hue perfectly complements the Valentine’s Day aesthetic, making these bite-sized treats both romantic and delicious.
Whether you’re planning a cozy night in or adding a personal touch to your Valentine’s Day boyfriend ideas, these truffles are an easy yet impressive way to show your love.
Let’s explore how to make this thoughtful dessert and why it’s a standout among Valentine’s Day treats.
DIY Valentine’s Gifts for Your Boyfriend: Red Velvet Truffles for a Valentine’s Day Aesthetic
Step 1: Prepare the Red Velvet Cake
Start by preheating your oven and mixing the red velvet cake batter as directed on the box. Pour the batter into a greased 9×13-inch pan and bake according to the package instructions. Keep an eye on the cake in the final minutes of baking, as red velvet can overbake quickly and lose its signature moist texture.
Once baked, allow the cake to cool completely. This step is crucial—warm cake will not crumble properly and can make the mixture too sticky when combined with the cream cheese.
Why This Step Matters:
The cake serves as the foundation for your truffles. Taking the time to bake it perfectly and let it cool ensures the right texture and consistency for the next steps.
Step 2: Create the Truffle Dough
Once your cake has cooled, use a knife to trim away the crisp edges. While the edges are delicious on their own, they can create a dry or inconsistent texture in the truffle dough, so they’re best left out.
Break the remaining cake into small pieces and place them in a large mixing bowl. Add the softened cream cheese to the crumbled cake. Using your hands is the easiest way to combine the ingredients until you achieve a smooth, dough-like consistency. It should be moist enough to hold together but not overly sticky.
Pro Tip: If you prefer less mess, you can use a stand mixer fitted with a paddle attachment, but working the dough by hand gives you more control over the texture.
Step 3: Roll and Chill the Truffles
Using a small cookie scoop or a tablespoon, portion out the dough and roll it into balls about the size of a walnut. Each ball should be roughly 2 tablespoons of the mixture. Place the rolled truffles on a baking sheet lined with parchment paper, spacing them slightly apart to prevent sticking.
Once all the dough is shaped, place the baking sheet in the freezer for at least 30 minutes. This step is essential for firming up the truffles, making them easier to coat in chocolate later.
Why This Step Matters:
Freezing solidifies the truffles, ensuring they hold their shape during the dipping process. Skipping this step could lead to soft or misshapen truffles.
Step 4: Melt the White Chocolate
While the truffles are chilling, prepare the coating. Chop your almond bark or white chocolate candy melts into smaller pieces for even melting. Place them in a microwave-safe bowl and heat in 30-second intervals, stirring well between each round. Continue until the chocolate is fully melted and smooth.
If the chocolate seems too thick for dipping, you can add a teaspoon of vegetable oil or shortening to thin it out. This makes it easier to coat the truffles evenly.
Pro Tip: Avoid overheating the chocolate, as it can seize up and become unusable. Stirring frequently helps distribute the heat and ensures a glossy finish.
Step 5: Dip and Decorate
Now comes the fun part! Remove the truffles from the freezer. Using a fork or a candy-dipping tool, dip each truffle into the melted white chocolate. Tap the fork gently against the side of the bowl to remove any excess coating.
Place the dipped truffles back onto the parchment-lined baking sheet. While the chocolate is still wet, add sprinkles or drizzle with additional melted chocolate for an extra touch of elegance. You can even use cake crumbs to garnish for a unique presentation.
Why This Step Matters:
The coating not only seals in the flavor but also adds a satisfying crunch. Decorating the truffles makes them visually appealing, perfect for gifting or serving at special events.
Step 6: Set the Coating
Once all the truffles are dipped and decorated, allow the chocolate to set. You can speed up this process by placing the tray back in the freezer for a few minutes. Alternatively, let them harden at room temperature if you’re not in a rush.
After the chocolate has fully hardened, your Red Velvet Truffles are ready to enjoy!
Pro tip: You can color your white chocolate with certain food coloring to give your truffles a richer hue. To color white chocolate, use oil-based candy coloring made specifically for chocolate or powdered candy coloring. Avoid liquid food coloring or gel icing colors, as their water content can cause the chocolate to seize, leading to hardening or thickening.
Now that you’ve got all the tips and tricks, it’s time to get started on your own batch of Red Velvet Truffles. Follow the detailed steps above, and scroll down for the quick recipe to save or print for future use!
Red Velvet Truffles Recipe
These Red Velvet Truffles are a decadent dessert made with moist red velvet cake, creamy filling, and a crisp white chocolate shell. They’re the ultimate treat for Valentine’s Day, Christmas, or any special occasion.
Prep Time: 10 minutes
Bake Time: 30 minutes
Chill Time: 30 minutes
Total Time: 1 hour 10 minutes
Ingredients
- 1 box of red velvet cake mix
- Ingredients as directed on the cake box (water, oil, eggs)
- 10 ounces of softened cream cheese
- 12 ounces of almond bark or white chocolate candy melts
- Decorative sprinkles
Directions
1. Bake the Cake
Prepare the red velvet cake according to the instructions on the box, using a 9×13-inch pan. Let the cake cool completely before moving on.
2. Prep the Cake Base
Cut off and discard the crispy edges of the cake. Break the remaining cake into crumbs in a large mixing bowl. Add the softened cream cheese to the crumbs and mix until it forms a dough-like consistency. For best results, use your hands to combine the ingredients thoroughly.
3. Form the Truffle Balls
Scoop approximately 2 tablespoons of the cake mixture and roll it into a ball. Repeat with the remaining mixture and arrange the balls on a parchment-lined baking sheet. Place the sheet in the freezer for about 30 minutes, or until the balls are firm.
4. Melt the Coating
Melt the almond bark or white chocolate candy melts in a microwave-safe bowl, heating in 30-second intervals. Stir after each interval until the coating is smooth and melted completely.
5. Dip the Truffles
Using a fork or candy-dipping tool, coat each chilled cake ball in the melted chocolate. Gently tap off the excess coating, then place the truffles back onto the parchment paper.
6. Add Toppings
Before the chocolate hardens, decorate the truffles with festive sprinkles. For added flair, drizzle melted chocolate over the top or sprinkle with leftover cake crumbs.
7. Set and Enjoy
Allow the coated truffles to set completely by chilling them briefly in the freezer or leaving them at room temperature. Once the chocolate shell is firm, your truffles are ready to serve!
A Sweet Ending to Your Valentine’s Day
These Red Velvet Truffles aren’t just desserts; they’re a gesture of love wrapped in rich flavors and a festive Valentine’s Day aesthetic.
Whether you’re surprising your boyfriend or partner with a thoughtful DIY Valentine’s gift or adding a touch of romance to your Anniversary celebration, these treats deliver both taste and charm.
Their vibrant red hue and indulgent texture make them the perfect addition to your list of Valentine’s Day boyfriend ideas.
Treat your special someone to a dessert that’s as heartfelt as it is delicious, and make this Valentine’s Day one to remember.
Enjoy!
Pin It On Pinterest For Later!
If you’re looking for the perfect dessert that’s as delightful to eat as it is to share, this Strawberry Cake Balls Recipe is just the thing!
These sweet and creamy bite-sized treats are ideal for any occasion, from elegant tea parties with friends to Valentine’s Day celebrations filled with love.
The rich, strawberry-flavored center coated in a smooth, decorative shell makes this Strawberry Truffles Recipe a standout.
Whether you’re hosting a gathering for adults or creating fun moments with kids, these mini treats are a delicious way to impress and indulge.
Check out the detailed recipe below!
Strawberry Cake Truffles: The Perfect Mini Treat for Celebrations
Step 1: Prepare the Cake Mix
Before diving into the mixing and shaping, the first step ensures your cake mix is safe to use.
Preheat your oven to 350°F and spread the dry strawberry cake mix evenly onto a parchment-lined baking sheet.
Heat-treating the mix for five minutes eliminates any potential bacteria, making it perfect for no-bake recipes.
Once baked, transfer the mix to a wire rack and let it cool completely. This is also a great time to gather your other ingredients, so everything is ready when you start creating.
Step 2: Mix Up the Dough
In a medium mixing bowl, beat the softened cream cheese with a hand mixer until it reaches a smooth, velvety consistency.
Gradually add the cooled cake mix in small increments, stirring gently with a spatula to minimize mess.
Once the mix is fully incorporated, switch back to your hand mixer to create a dough-like consistency.
For an extra burst of flavor, fold in the chopped cream cheese chips, ensuring they’re evenly distributed throughout the dough.
The chips add little pockets of creamy sweetness that take these truffles to the next level.
Step 3: Chill the Dough
Wrap the dough tightly with plastic wrap and place it in the refrigerator for at least two hours.
This chilling period is crucial, as it allows the dough to firm up, making it much easier to handle when it’s time to roll into truffles.
Use this time to prepare your workspace and gather tools like a cookie scoop, parchment paper, and baking sheets.
Step 4: Shape the Truffles
Once the dough has chilled, it’s time to shape the truffles.
Line two baking sheets with parchment paper to prevent sticking.
Using a small cookie scoop (about 1½ tablespoons), portion out the dough and roll each portion into a smooth ball between your hands.
Arrange the balls on the prepared baking sheets, leaving a little space between each one. Let the shaped truffles rest for about 15 minutes before coating.
This rest period reduces the chance of cracking when you dip them into the melted coating.
Step 5: Melt the Vanilla Coating
For a smooth and even coating, melt the vanilla melting wafers over a double boiler on low heat.
Stir the wafers continuously to prevent scorching, or alternatively, use the microwave in 30-second intervals, stirring between each session until fully melted.
The double boiler method is particularly useful for maintaining an even temperature, which keeps the coating easy to work with throughout the dipping process.
Step 6: Coat the Truffles
Now comes the fun part—dipping the truffles! Place one dough ball on a fork and gently lower it into the melted vanilla coating.
Lift it out and tap the fork lightly on the edge of the bowl to let the excess coating drip off.
Carefully transfer the coated truffle back to the parchment-lined baking sheet.
Repeat this process for all the truffles, working efficiently to coat each one.
If you want to add sprinkles, sprinkle them over half of the truffles while the coating is still wet so they adhere perfectly.
Step 7: Add Decorative Touches
To give your truffles a polished and festive finish, melt the pink and bright pink candy melts in separate microwave-safe piping bags.
Heat them in 15-second intervals, kneading the bags gently between each session, until the candy melts are smooth and flow easily.
Snip a small tip off each bag and drizzle the melted candy over the remaining truffles in thin, artistic lines.
This step is where you can really get creative—try swirling the colors or layering them for a playful effect.
Step 8: Set and Serve
Allow the truffles to set completely before serving.
You can leave them at room temperature or place the baking sheets in the fridge for faster results.
Once the coating has hardened, your Strawberry Cake Truffles are ready to be enjoyed! Serve them on a decorative platter or package them in gift boxes for a thoughtful and delicious present.
These Strawberry Cake Truffles are a guaranteed crowd-pleaser, whether you’re making them for a special occasion or just treating yourself.
Their vibrant pink hues and irresistible flavor make them the star of any dessert table.
See The Quick Recipe Version below-
Strawberry Cake Truffles
It’s the perfect mini treat for any dessert lover.
Ingredients
- 15.25 ounces strawberry cake mix (such as Betty Crocker)
- 8 ounces cream cheese, softened
- ⅓ cup chopped cream cheese chips
- 20 ounces vanilla melting wafers (e.g., Ghirardelli)
- ½ cup pink candy melts
- ½ cup bright pink candy melts
- Sprinkles (optional)
Instructions
- Prepare the Cake Mix
Preheat your oven to 350°F and line a baking sheet with parchment paper. To ensure the cake mix is safe to use, spread it out on the baking sheet and bake for 5 minutes to heat-treat it. Once done, allow the mix to cool completely on a wire rack.
- Create the Dough
In a medium bowl, beat the softened cream cheese with a hand mixer until it’s smooth and creamy. Gradually add the cooled cake mix to the bowl, stirring gently with a spatula to avoid messes. Once incorporated, use the hand mixer again to blend everything into a dough-like consistency. Mix in the chopped cream cheese chips until evenly distributed.
- Chill the Dough
Cover the dough with plastic wrap and refrigerate for at least 2 hours. This step ensures the truffles are firm and easier to handle.
- Shape the Truffles
Line two baking sheets with parchment paper. Use a small cookie scoop (about 1½ tablespoons) to portion out the dough, rolling each scoop into a smooth ball. Place the balls on the prepared sheets and let them rest for 15 minutes to prevent cracking during coating.
- Melt the Coating
Melt the vanilla wafers using a double boiler over low heat or microwave them in 30-second intervals, stirring until smooth. The double boiler method keeps the coating at an even temperature, making it easier to work with.
- Coat the Truffles
Place a dough ball on a fork, dip it into the melted vanilla coating, and gently tap the fork on the edge of the bowl to remove excess. Transfer the coated truffle to the lined baking sheet. Repeat with all the truffles, spacing them 2 inches apart. If desired, add sprinkles to half of the truffles before the coating sets.
- Decorate
Melt the pink and bright pink candy melts in separate microwave-safe piping bags, heating them gently until smooth. Snip the tips of the bags and drizzle the melted candy over the remaining truffles for a decorative touch.
- Set and Serve
Allow the truffles to set completely before serving. Enjoy these sweet, strawberry-infused bites!
Strawberry Cake Truffles are the ultimate blend of charm and indulgence, making them a perfect treat for countless occasions.
From Valentine’s Day sweets to dainty additions for tea parties, their vibrant pink color, creamy texture, and delightful flavor are sure to impress.
The combination of simple ingredients and easy-to-follow steps ensures anyone can create these bite-sized masterpieces.
Whether you’re sharing them as gifts, serving them at a party, or enjoying them with loved ones, these Strawberry Cake Truffles are a sweet way to celebrate life’s little moments.
Try them for yourself and let their irresistible charm brighten your day!
Pin It On Pinterest For Later!
Blackberry cheesecake takes a timeless dessert and elevates it with a burst of berry goodness! This version features a luscious swirl of sweet-tart blackberry compote that perfectly complements the velvety, rich cheesecake.
Sitting atop a thick, buttery graham cracker crust, each bite combines the crunch of the base with the smoothness of the filling.
Topped off with a drizzle of melted chocolate, delicate chocolate shavings, and plump, fresh blackberries, this cheesecake doesn’t just taste divine—it’s a showstopper for any holiday spread.
Its beautiful contrast of deep purple berries and dark chocolate accents makes it an ideal centerpiece for Christmas or any festive gathering.
But this extravagant dessert is an absolutely fabulous choice for Summer when the berries are perfectly ripe or any other season too! Grocers usually have blackberries all year round.
Check out our recipe below.
Decadent Blackberry Cheesecake with a Chocolate Twist
The Ingredients
To whip up this magical blackberry cheesecake, you’ll need a handful of simple yet essential ingredients.
Start with smooth cream cheese, rich butter, and just the right amount of sugar to bring sweetness.
Eggs are key for that perfectly creamy texture, while a splash of vanilla adds warmth and depth. The crust comes together with crushed graham crackers and butter for that irresistible crunchy crust, and a squeeze of fresh lemon juice brightens up the flavors.
You’ll also need Milk chocolate to create shavings and to melt and drizzle on top of this luscious cheesecake.
These classic ingredients come together beautifully to create a berry cheesecake that’s both rich and refreshing.
- Graham Crackers – A crunchy homemade crust made from crushed graham crackers, sugar, and melted butter provides the perfect base for this cheesecake.
- Eggs – Essential for structure, eggs help the cheesecake set beautifully with a creamy, smooth texture.
- Blackberries – Fresh blackberries are pureed and strained to create a vibrant, sweet-tart swirl throughout the cheesecake.
- Lemon Juice – A squeeze of lemon juice brightens up the flavor and balances the richness of the cream cheese and the sweetness of the blackberries.
- Cream Cheese – Use full-fat brick-style cream cheese to achieve that perfect, rich, and creamy consistency. Be sure it’s softened to avoid lumps.
- Melted Chocolate & Chocolate Shavings – Drizzle melted chocolate on top of the cheesecake, and finish with a sprinkle of chocolate shavings to add a luxurious touch and extra flavor.
How to Our Blackberry Cheesecake With Chocolate Toppings
Prepare the Graham Cracker Crust:
Begin by crushing your graham crackers in a food processor or blender until they reach a fine, sand-like consistency.
In a medium-sized bowl, combine the crumbs with sugar and melted butter, stirring until the mixture has the texture of damp sand.
Press the graham cracker mixture firmly and evenly into the bottom of a springform pan, using the base of a cup to ensure a smooth, compact layer.
Bake at 350°F for 4-5 minutes, or until the crust is slightly golden.
Once baked, allow it to cool before either wrapping the outside of the pan with aluminum foil or using a silicone protector to keep the cheesecake secure during baking.
Create the Blackberry Puree:
In a blender, combine fresh or thawed blackberries with lemon juice and sugar.
Blend the mixture until it’s completely smooth. Using a fine mesh strainer, pour the mixture into a bowl, straining out any seeds.
The result should be about ½ cup of vibrant blackberry juice, ready to swirl into your cheesecake.
Prepare the Blackberry Cheesecake:
In the bowl of a stand mixer with a paddle attachment, add the softened cream cheese and mix on medium speed until it’s smooth and creamy, about 1-2 minutes.
Be sure to scrape down the sides of the bowl to ensure an even texture.
Add in the sugar and mix until fully incorporated, then scrape the bowl again. Next, add in the lemon juice and eggs, one at a time, mixing briefly between each addition.
Scrape down the sides once more, and mix just until everything is combined—be careful not to overmix to avoid incorporating too much air.
Bake the Cheesecake:
Pour the cheesecake batter over the prepared graham cracker crust, smoothing it out into an even layer.
Slowly drizzle the blackberry puree on top of the batter, then use a skewer or butter knife to gently swirl it in, creating a marbled effect. Be careful not to disturb the crust as you swirl.
Place the springform pan inside a larger baking dish, then carefully fill the outer dish with hot water, creating a water bath.
Transfer everything to the preheated oven and bake for 35-45 minutes, until the edges are set but the center still has a slight jiggle.
After baking, let the cheesecake sit in the oven with the heat off for about 30 minutes before transferring it to the counter to cool completely.
Add the Chocolate Toppings:
Prepare the chocolate toppings. Using a vegetable peeler or grater, make fine chocolate shavings and set them aside.
Melt chocolate in a double boiler or microwave in short bursts, stirring until smooth.
Drizzle the melted chocolate across the top of the cheesecake once it’s been fully cooled and chilled, letting some drip down the sides for a decorative touch if you’d like.
Arrange fresh blackberries on top of the cheesecake, placing the chocolate shavings on and in between the berries for an elegant presentation.
Finish with an extra drizzle of melted chocolate over the berries for added richness. You can add as much or as little chocolate as you want.
The results come out really beautifully!
Chill and Serve:
Once the cheesecake has cooled, refrigerate it for at least 4 hours to allow it to fully set before serving.
When ready, slice and serve, adding a garnish of fresh blackberries or a touch of whipped cream for an extra flourish.
Tips For A Perfect Cheesecake
Achieve Softened Cream Cheese – To ensure a smooth and creamy cheesecake, let your cream cheese sit out at room temperature until it’s completely softened. This prevents any lumps from forming, resulting in a velvety texture.
Avoid Overbaking – It can be tricky to determine when your cheesecake is done. Look for the edges to be set while the center remains slightly jiggly when you gently shake the pan. Remember, the cheesecake will continue to cook and firm up as it cools.
Strain the Blackberry Puree – To enhance your cheesecake experience, strain the blackberry puree to remove the seeds. This step ensures a smoother consistency and allows the sweet-tart berry flavor to shine without any crunchy interruptions.
Perfecting Your Slices – For beautifully clean slices of cheesecake, dip a sharp knife into hot water, wipe it dry, and then cut. Repeat this process for each slice to achieve that pristine look every time!
Prevent a Soggy Crust – Instead of using aluminum foil, opt for a silicone cheesecake pan protector. This will keep water out during baking, ensuring your crust stays perfectly crisp without the risk of becoming soggy.
The Recipe
Equipment You’ll Need:
- High-speed blender
- 9.5-inch springform pan
- Silicone cheesecake pan protector or aluminum foil
- Fine mesh strainer
- Stand mixer with paddle attachment or large bowl with hand mixer
- Silicone spatula
- Two medium-sized bowls
- Large baking pan (10×15-inch, 4.5 qt) for the water bath
Ingredients:
For the Graham Cracker Crust:
- 1 ½ cups crushed graham crackers (about 8 ounces)
- 1 tablespoon granulated sugar
- Pinch of salt
- 5 tablespoons unsalted butter, melted
For the Blackberry Puree:
- 6 ounces fresh blackberries (around ½ cup)
- 2 tablespoons granulated sugar
- 2 teaspoons freshly squeezed lemon juice
For the Cheesecake Filling:
- Two 8-ounce packages of full-fat cream cheese, softened
- 1 cup granulated sugar
- 2 teaspoons vanilla bean paste or pure vanilla extract
- 2 teaspoons fresh lemon juice or zest from half a lemon
- ⅛ teaspoon salt
- 2 large eggs, room temperature
- 4 cups hot water (for the water bath)
Instructions:
Prepare the Graham Cracker Crust:
Start by preheating your oven to 350°F. Pulse the graham crackers in a high-speed blender or food processor until they’re finely crushed. Transfer the crumbs to a medium bowl and mix in the granulated sugar and a pinch of salt. Stir until evenly combined, then pour in the melted butter and stir until the mixture takes on the texture of damp sand.
Press the mixture into the bottom of a springform pan, using a measuring cup or flat utensil to pack it down tightly and evenly. Bake for around 4-5 minutes, just until lightly golden. Take care not to overbake. Set the crust aside to cool while you prepare the blackberry puree. Once cooled, wrap the pan in aluminum foil or use a silicone cheesecake protector to prevent any water leakage during baking.
Make the Blackberry Puree:
Rinse the fresh blackberries and place them in a blender along with the granulated sugar and lemon juice. Blend until smooth, then strain the mixture through a fine mesh sieve into a bowl, discarding the seeds. You should be left with about ½ cup of silky blackberry juice. Set aside for later.
Create the Cheesecake Filling:
In the bowl of a stand mixer fitted with the paddle attachment (or in a large bowl with a hand mixer), beat the softened cream cheese on low until smooth and lump-free. Gradually add in the sugar, mixing until fully incorporated. Scrape down the sides and bottom of the bowl to ensure everything is blended evenly.
Next, mix in the vanilla bean paste (or vanilla extract), lemon juice, and salt. Once those are combined, add the eggs one at a time, making sure to scrape down the bowl between additions. Avoid overmixing, as this can cause cracking during baking.
Pour the cheesecake filling over the graham cracker crust, tapping the pan on the counter to release any trapped air bubbles. Carefully drizzle the prepared blackberry puree over the surface of the cheesecake filling. Use a skewer or butter knife to gently swirl the blackberry puree throughout the cheesecake, creating a marbled effect without disturbing the crust.
Bake the Cheesecake:
Place the springform pan into a larger baking pan, and fill the outer pan with hot water to create a water bath. This will prevent cracking and ensure even cooking. Transfer the pans to the center of your preheated oven and bake the cheesecake for 35-40 minutes, or until the edges are set but the center still has a slight jiggle when gently shaken.
Once the cheesecake is done baking, turn off the oven and crack the door open slightly, allowing the cheesecake to cool in the oven for about 30 minutes. Remove it from the water bath and allow it to cool completely at room temperature for an additional 1-2 hours. After it has fully cooled, cover the cheesecake with plastic wrap and refrigerate for at least 4 hours or overnight to set completely.
Serving the Cheesecake:
When you’re ready to serve, dip a sharp knife into hot water, wipe it clean, and slice the cheesecake. Repeat this process for each slice to ensure smooth, clean cuts. Top with fresh blackberries melted chocolate drizzle, or a dollop of whipped cream for an extra touch. Enjoy your delicious blackberry cheesecake!
This decadent Blackberry Cheesecake is the perfect dessert for any occasion, whether you’re hosting a holiday gathering or just craving something sweet and indulgent on a warm Summer day.
The combination of the rich, creamy cheesecake, the vibrant blackberry swirl, and the crisp graham cracker crust creates a dessert that’s both elegant and bursting with flavor.
The addition of melted chocolate drizzled on top adds an extra layer of decadence, making it not only taste amazing but also look stunning when served.
With a few simple ingredients and the right technique, you’ll have a show-stopping dessert that will impress your guests and leave them coming back for more.
Enjoy!
Pin It On Pinterest For Later!